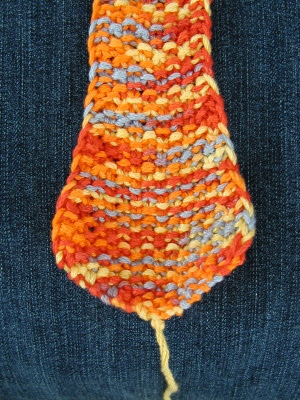
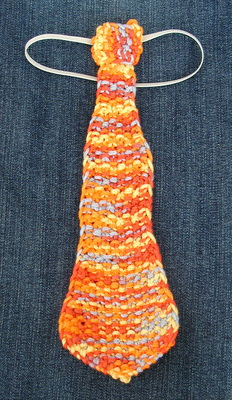
Click to download the Easter Tie pattern.
Easter Tie
Knitter Achievement Level: Just a touch above beginner.
Size: Toddler & Child
Finished Measurements:
Toddler: 11" long, 3.5" at widest point, 1" at narrowest.
Child: 4.5" at widest point, 1.4" at narrowest.
Gauge: 5st/in in moss stitch.
Materials:
1 skein Plymouth Yarn Fantasy Naturale, (or other 100% Mercerized Cotton worsted). The Toddler size pictured took <25g.>
Needles: Size needed to obtain gauge.
Notes: I used a little trick I learned from Elizabeth Zimmerman in Knitting Without Tears. The first stitch of every row is slipped and the last stitch is purled, making a clean braided edge. Very pretty. :o) Just be sure to resist the urge to pull the slipped stitch tight as you begin the row. It makes the edging too snug, and causes the tie to dish instead of lie flat.
Instructions:
Place a slip knot on your left needle. (That's CO 1.)
Kfb. Turn. (2st)
K2fb Turn. (4st)
Kfb, p1, k1, kfb. Turn. (6st)
Kfb, p1, k1 to last st, kfb. Turn (8st)
Repeat last row until you have 18 st on the needle.
Work four rows even: S1, work moss stitch across, p1. Turn
Work decrease row: S1, ssk, work moss stitch to last three stitches, k2tog, p1. (16 st.)
Work three rows even, then one decrease row. Repeat three times, leaving you with 10 st.
Work 22 rows even. Work decrease row. (8 st)
Work one row even. Work decrease row. (6 st)
Work 30 rows even. (Or adjust to provide the proper length for your munchkin.) My guy has a long waist, so 30 rows provided the right length and allowed enough to wrap around at the top for a faux Windsor knot. Just hold the tie-in-progress up to the top button on a dress shirt and keep knitting until the point of the tie reaches just above the belt buckle. Read the folding instructions below to see how to allow length for folding the knot.
When you’ve got enough to make the end of the tie reach the right edge of the tie body when it’s folded, you begin decreasing to make the wedge-shaped top that will reach around to meet the fold in the back. (I confess: this folding bit is borrowed from origami.)
Decrease for seam edge:
S1, k3, k2tog, p1. Turn. (5 st)
S1, ssk, w1, p1. Turn.
S1, w1, k2tog. Turn.
Ssk, w1. Turn.
k2tog. You should have one stitch left on the needle. Cut the working yarn, leaving a tail long enough for seaming (about 8”-10”), and pull the end of the yarn out of the last stitch so the tail of the yarn prevents the work from unraveling. (I’m sure there’s a neat little term for this: if anyone knows it, will they please let me know?)
Here’s what mine looked like at this point:
(Click to enlarge.)
To make the “knot” at the top, do the following:
Fold the top of the tie 90° to the left so the left edge of the tie body is visible all the way to the top of the fold.
Then fold the tail of the tie to the right so it’s gently snugged up against the body of the tie.
Turn the tie over carefully, and match the angled top edge with the 45° edge of the 90° fold you made first. (Yes, a 90° fold has a 45° edge. lol)
Then take the tail and whip stitch the two edges together. By choosing selectively which stitches to pick up you can ease the “knot” into looking pretty straight. (My stitches are highlighted in blue.)
Next, take your ¼” elastic and your munchkin and measure how much you’ll need to let it reach around their shirt collar with about 1/2" overlap while at rest. It’s important to make sure that the elastic isn’t stretched at all, for hopefully obvious reasons. (We don’t want any munchkin necks to be squeezed during the wearing of this tie. :o) Mark the point where the end of the elastic meets the length of the elastic, and then cut it with the ½” overlap. You can see in the photo below how the marked point serves in alignment after the elastic is cut.
Line up the cut end of the elastic with the mark you just made, and then hand or machine sew the elastic into a loop. Hand sew that loop to the back of the tie. Your project should look something like this from the back now:
From the top:
Weave in the tail at the cast-on point, and you’re done!
Corral your munchkin, and take a photo to email me for the Easter Tie gallery. (Email address at the bottom of the pattern.)
Enjoy!


